Introduction
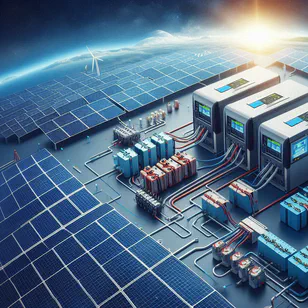
Connecting a single-phase inverter to a home powered by a three-phase electrical system is not only possible but quite common. In fact, about 90% of the inverter installations we perform follow this method. We often install multiple inverters in such homes to achieve a more balanced power distribution. Whether you’re integrating a solar power system or an uninterruptible power supply (UPS), following the right steps ensures your setup will run safely and efficiently.
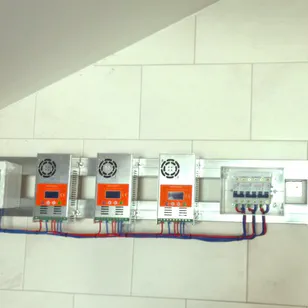
1. Preparing the Inverter
First, mount the inverter and connect the necessary wiring. For solar panel and battery connections, use either circuit breakers or fuses to protect your system. On the AC side, install appropriate circuit breakers for both the input and output lines, ensuring they match the inverter’s specifications.
If you’re looking to ensure that your inverter can handle essential appliances like refrigerators or freezers, you can refer to our guide on powering refrigerators with inverters and UPS systems , which explains the challenges of handling start-up currents.
2. Checking the Neutral Wire
It is critical to verify that the neutral wire is correctly connected at all times. Failure to secure the neutral can result in dangerous situations where the phase is present, but the neutral is not. Double-check this step before proceeding with any further installations.
3. Installing a Three-Position Switch
A three-position switch is essential for switching between the inverter, grid power, and bypassing the inverter altogether. This feature can be a lifesaver during emergency situations, ensuring that power can be seamlessly redirected when necessary.
To understand the importance of such switches, our comprehensive guide on three-position switches covers installation tips and functional benefits.
4. Identifying Priority Loads
In your electrical panel, identify the devices that need to have continuous power, like your internet router, well pump, lights, and essential outlets. These devices should be connected either by a bus bar or bridging wires to ensure that they remain powered during grid outages.
For further information on prioritizing power consumption and optimizing solar panel installations, you can read our guide on solar panel tilt for seasonal efficiency , especially if you’re using solar energy in an autonomous system.
5. Allocating Devices with Flexible Power Sources
Some appliances, such as water heaters, ovens, and induction stoves, can be powered by either the grid or the inverter depending on energy needs and available sunlight. A three-position switch for each of these devices will allow you to decide whether to use solar power or grid electricity based on the season, energy demand, and system load.
6. Final Wiring
Connect one phase to the inverter input, and the inverter output to the prioritized loads (from step 4) and the two three-position switches (from step 5). The second input of these switches should be connected to an unloaded phase of the grid.
After installation, test the system for a week to ensure that all devices are connected to the correct power category. Once confirmed, you can enjoy the benefits of energy autonomy.
For more on inverters, their types, and applications, check out our inverter guide , which explains the key parameters for choosing the best inverter for your home energy system.